Use Speech Recognition in Windows XP

Speech recognition enables the operating system to convert spoken words to written text. An internal driver, called an speech recognition engine, recognizes words and converts them to text. The speech recognition engine may be installed with the operating system or at a later time with other software. They can also use different voices allowing for regional accents such as British English, or use a different language altogether such as German, French, or Russian.

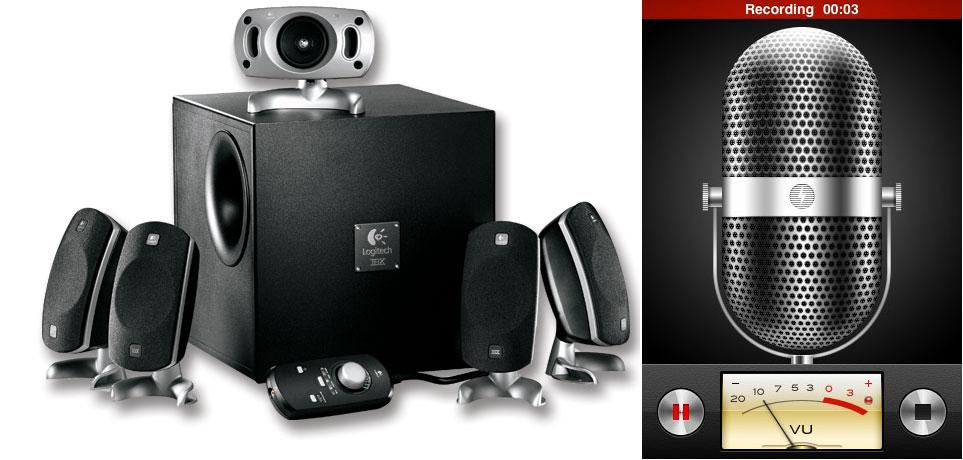
You need a microphone or some other sound input device to receive the sound. In general, the microphone should be a high quality device with noise filters built in. The speech recognition rate is directly related to the quality of the input. The recognition rate is significantly lower or may be unacceptable if you use a poor microphone. The Microsoft Speech Recognition Training Wizard (Voice Training Wizard) guides you through the process, recommends the best position to place the microphone, and allows you to test it for optimal results.

How to Train the Speech Recognition Engine

When you train the speech recognition engine, the speech recognizer uses the Voice Training Wizard to adapt to the sound of your voice, word pronunciation, accent, speaking manner, and even new or idiomatic words. If you train for as little as ten minutes, you can improve speech recognition capabilities. The system also adapts to your speech on an ongoing basis and recognition increases over time.

To train the speech recognition engine, follow these steps:

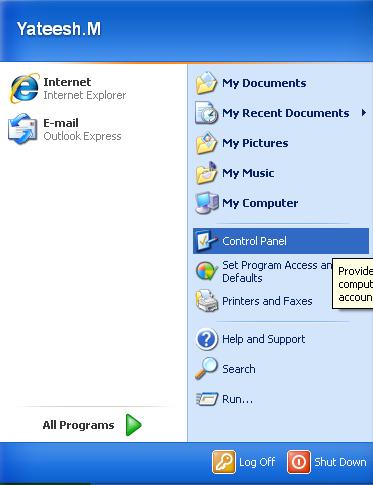
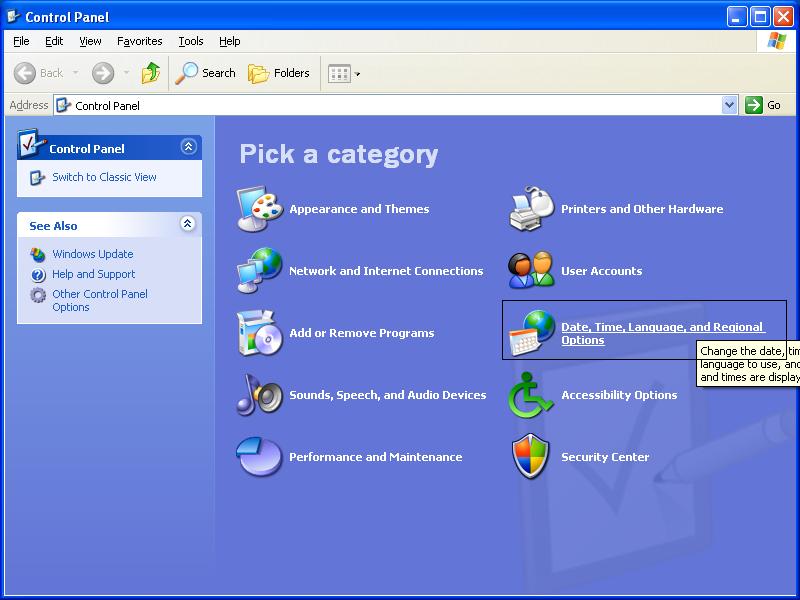
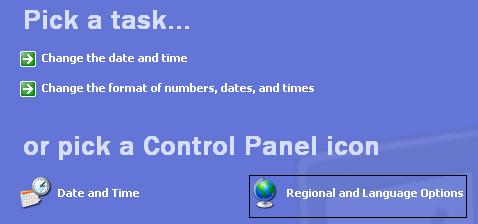
1. Click Start–> click Control Panel–> and then double-click Speech.

2. Click the Speech Recognition tab–> and then click the speech recognition engine that you want to use in the Language box.

3. Click the profile that you want to use in the Recognition Profile group. Training is specific to an engine and profile so that training one engine or profile set has no effect on any other engine or profile set.

4. Click Train Profile–> and then follow the directions in the Voice Training Wizard. Not all engines support training. If your engine does not, Train Profile is unavailable.

NOTE: It is recommended that you spend at least 15 minutes training the computer. The more training you do, the higher your recognition accuracy will be.

Posted in Pc Support, Speech Recognition, Speech Recognition Windows XP, Speech Software, Technical Support, TechSupp247, Windows XP Home Support, Windows XP Professional Support, Windows Xp Support, XP Speech | Leave a comment

Add Handwriting Recognition as a Text Service

When handwriting recognition is installed, it is normally added automatically as a text service. Follow these steps to add handwriting recognition only if you removed it as a text service and you want to add it again.


1. Click Start–> click Control Panel–> click Date, Time, Language, and Regional Options–> and then click Regional and Language Options.

2. Click the Languages tab.

 3. Under Text services and input languages–> click Details.

 4. Under Installed services–> click Add.

 5. In the Input language list–> click the language for which you want to add handwriting recognition.

6. Click to select the Handwriting recognition check box.

7. Click the handwriting program that you want to use–> and then click OK.

If you want to add additional handwriting programs–> click Add–> click to select the Handwriting recognition check box–> click the handwriting program that you want–> and then click OK.
Click OK twice.

Handwriting recognition is added as a text service for the language that you specified.

Posted in Add Handwriting Recognition, Handwriting Recognition, Pc Support, Technical Support, TechSupp247, Text Service, Windows XP Home Support, Windows XP Professional Support, Windows Xp Support | Leave a comment

Record Audio Or Video In Windows Xp

There are usually times when you would have wanted to record some music from some movie that you were watching or some music of youtube.com
But using the microphone to record music from the speakers always result in poor quality due to background noise.
But what if you can record the sound directly from the sound card that gives out the sound output?

Here’s how:
Open the Volume control by right clicking on the volume icon from the taskbar and selecting “Open Volume Control”


  • Go to “Properties”
  • Select “Recording”

And make a check mark on “Mono Mix” or “Stereo Mix” whichever is available and then click on “OK”
Close the Volume Control window.
Now Click on “Start”. Choose “All Programs” and then “Accessories” to choose “Sound Recorder” under “Entertainment”

Now, play the music on youtube or any DVD and Use the Sound Recorder to record the ultra clear sound!!

The same can be used for Windows Vista and Windows 7 except that the Volume control settings differ by a little

Posted in Pc Support, Record Audio, Record Audio Video In Windows Xp, Record Video, Technical Support, TechSupp247, Windows Support, Windows XP Home Support, Windows XP Professional Support, Windows Xp Support | Leave a comment

Handwriting recognition in Windows XP

With the handwriting-recognition feature, you can use your handwriting instead of a keyboard to enter text. You can write by using a handwriting input device, such as a digital pen or stylus, or by moving your mouse pointer. The computer converts your handwritten words to typed characters, and then inserts the text exactly where you want it.


Handwriting Recognition Requirements

To use handwriting recognition, you need the following:

1. A writing tool. The minimum requirement for a writing tool is a mouse. To write with your mouse, press and hold down the primary mouse button, and then move the mouse pointer to form characters. The recommended tool is a handwriting input device, such as a pen stylus and tablet, connected to your computer through a serial port or USB port. Graphics tablets that are used with three-dimensional (3-D) drawing or computer-aided design (CAD) programs can also be used.

2. The Microsoft handwriting-recognition engine installed on a Windows XP-based computer.

Programs that support handwriting recognition in Windows XP include the following:

1. Microsoft Internet Explorer 6.0 or later.
Handwriting is supported in text boxes that are displayed in Web pages, but not on the Address bar.

2. Microsoft Outlook Express 6.0 or later.

3. All Microsoft Office XP programs.

4. Other programs that are enabled to use the Microsoft handwriting-recognition engine.
The handwriting-recognition engine is language-specific. The engine is currently available for the following languages: Simplified Chinese, Traditional Chinese, English, Japanese, and Korean.

How to Determine Whether the Handwriting Recognition Engine Is Installed

To determine whether the handwriting recognition is installed on your computer, follow the below steps:

1. Click Start–> click Control Panel–> click Date, Time, Language, and Regional Options–> and then click Regional and Language Options.

2. Click the Languages tab.

3. Under Text services and input languages–> click Details.

4. Under Installed services–> click Add.

If Handwriting recognition is listed as an option in the Add Input Language dialog box, the handwriting-recognition engine is installed. If it is not listed, the engine is not installed.

How to Install Handwriting Recognition if Microsoft Office XP Is Installed

1. Click Start–> click Control Panel–> and then click Add or Remove Programs.

2. Click Change or Remove Programs–> click Microsoft Office XP–> and then click Change.

3. Click Add or Remove Features–> and then click Next.

4. In the Features to install list–> expand Office Shared Features.

5. Expand Alternative User Input.

6. Click the box to the left of Handwriting–> and then click Run from My Computer.

7. Click Update.

When you are prompted, insert the Office XP CD-ROM into your computer’s CD-ROM or DVD-ROM drive, or click Browse to locate the Office XP installation files, and then click OK.
The handwriting-recognition engine is installed.

Posted in handwriting input device, Handwriting Recognition, Pc Support, pen stylus, Technical Support, TechSupp247, Windows Support, Windows XP Home Support, Windows XP Professional Support, Windows Xp Support | Leave a comment

Display My Documents Folder on the Start menu

To display My Documents on the Start menu, follow these steps:

1. Right-click Start–> and then click Properties–> Or if the Start menu is already displayed, right-click an empty area of the Start menu, and then click Properties.

2. Click Customize.

3. Click the Advanced tab.

4. In the Start menu items list–> under My Documents–> click Display as a link or Display as a menu–> and then click OK twice.

The next time you click Start–> the My Documents folder is displayed on the Start menu.

Posted in Display My Documents, My Documents, Pc Support, Technical Support, TechSupp247, Unhide My Documents, Windows Support, Windows XP Home Support, Windows XP Professional Support, Windows Xp Support | Leave a comment

Remove Or Hide My Documents Folder from the Start menu

If you do not want to display My Documents on the Start menu, follow these steps:

1. Right-click Start–> and then click Properties–> Or if the Start menu is already displayed–> right-click an empty area of the Start menu–> and then click Properties.


2. Click Customize.

3. Click the Advanced tab.

4. In the Start menu items list–> under My Documents–> click Don’t display this item–> and then click OK twice.

The next time you click Start–> the My Documents folder is no longer displayed on the Start menu.

NOTE: Removing the My Documents folder from the Start menu does not remove the files stored in the target location of the My Documents folder.

Posted in Hide My Documents Folder, Pc Support, Remove My Documents, Technical Support, TechSupp247, Windows Support, Windows XP Home Support, Windows XP Professional Support, Windows Xp Support | Leave a comment

Restore My Documents Folder to Its Default Location

By default, the target or actual location of the My Documents folder is C:\Documents and Settings\user name\My Documents, where C is the drive in which Windows is installed, and user name is the currently logged-on user. You can change the target if you want My Documents to point to a different folder location Or bring it back to its default location if it has been moved.

To restore the My Documents folder to its default location, follow these steps:

1. Click Start–> and then point to My Documents.

2. Right-click My Documents–> and then click Properties.

3. Click Restore Default–> and then click OK.

4. In the Move Documents box–> click Yes to move your documents to the new location–> or click No to leave your documents in the original location.

Posted in Change My Documents Location, default Location, My Documents, TechSupp247, Windows Support, Windows XP Home Support, Windows Xp Operating System, Windows XP Professional Support, Windows Xp Support | Leave a comment

Change the Default Location of My Documents Folder

The My Documents folder is your own personal folder in which you can store your documents, graphics, and other personal files. When there is more that one person using the computer, Windows creates a My Documents folder for each user on the computer.


By default, the target or actual location of the My Documents folder is C:\Documents and Settings\user name\My Documents, where C is the drive in which Windows is installed, and user name is the currently logged-on user. You can change the target if you want My Documents to point to a different folder location.

To change the default location of the My Documents folder, follow these steps:


1. Click Start–> and then point to My Documents.


2. Right-click My Documents–> and then click Properties.


3. Click the Target tab.

4. In the Target box–> do one of the following:

Type the path to the folder location that you want, and then click OK.
For example, D:\My Stuff.

If the folder does not exist–> the Create Message dialog box is displayed. Click Yes to create the folder, and then click OK.
-or-
Click Move–> click the folder in which to store your documents–> and then click OK twice.

If you need to create a new folder–> click Make New Folder. Type a name for the folder–> and then click OK twice.

5. In the Move Documents box–> click Yes to move your documents to the new location–> or click No to leave your documents in the original location.

Posted in Change Default Location, Documents Folder, My Documents, Pc Support, Technical Support, TechSupp247, Windows Support, Windows XP Home Support, Windows XP Professional Support, Windows Xp Support | Leave a comment

Set My Documents Folder as "Private" in Windows XP

To set the My Documents folder to Private:

1. On the Start menu–> right-click My Documents–> and then click Properties.

2. Click the Sharing tab–> and then click to select the Make this folder private so that only I have access to it check box.
3. Click Apply–> and then click OK.
Posted in Making folder private, My Documents, Pc Support, Secure Folder, Technical Support, TechSupp247, Windows Support, Windows XP Home Support, Windows XP Professional Support, Windows Xp Support | Leave a comment

Verify Unsigned Device Drivers in Windows XP

You can use the Windows XP Signature Verification tool (Sigverif.exe) to find unsigned drivers and verify device drivers in Windows XP. This can be helpful for troubleshooting system instability, error messages, boot problems, and so on.

Verify Unsigned Device Drivers

1. Click Start–> click Run–> type sigverif, and then click OK.

2. Click Advanced.

3. Click Look for other files that are not digitally signed.

4. In the Look in this folder box–> type x:\Windows\system32\drivers–> where x is the letter of the drive where Windows XP is installed.

5. On the Logging tab–> make sure the Save the file signature verification results to a log file check box is selected–> and then click OK.

6. Click Start.

NOTE: The log file is named Sigverif.txt, and it is saved in the Windows folder. Third-party drivers that are unsigned are displayed as “Not signed.” Use the drivers in this list as your troubleshooting starting point.

Disable Unsigned Device Drivers

A common problem is power management features, and Microsoft requires power management support to certify drivers. Many third-party unsigned drivers lack this support, resulting in power management problems (such as problems going into or coming out of hibernation and standby).

After you find unsigned drivers, you can disable them by using any of the following methods:

1. Disable the device in Device Manager (you may have to click Show hidden devices on the View menu, and then disable the device under the Non-Plug and Play Drivers branch).

2. Uninstall the software that installed the third-party driver by using the Add/Remove Programs tool in Control Panel.

3. Rename the driver in the Winnt\System32\Drivers folder.

Posted in Device Drivers, Device Manager, drivers, Pc Support, Power Management, Technical Support, TechSupp247, Unsigned Drivers, Windows Support, Windows XP Professional Support, Windows Xp Support | Leave a comment